
3D printing allows you to turn an idea into a real object quickly and accurately. Whether you are designing a product, prototype, or custom part, understanding the product design to 3D printing process is essential for getting high-quality results.
This step-by-step guide explains how a digital idea becomes a physical 3D printed product.
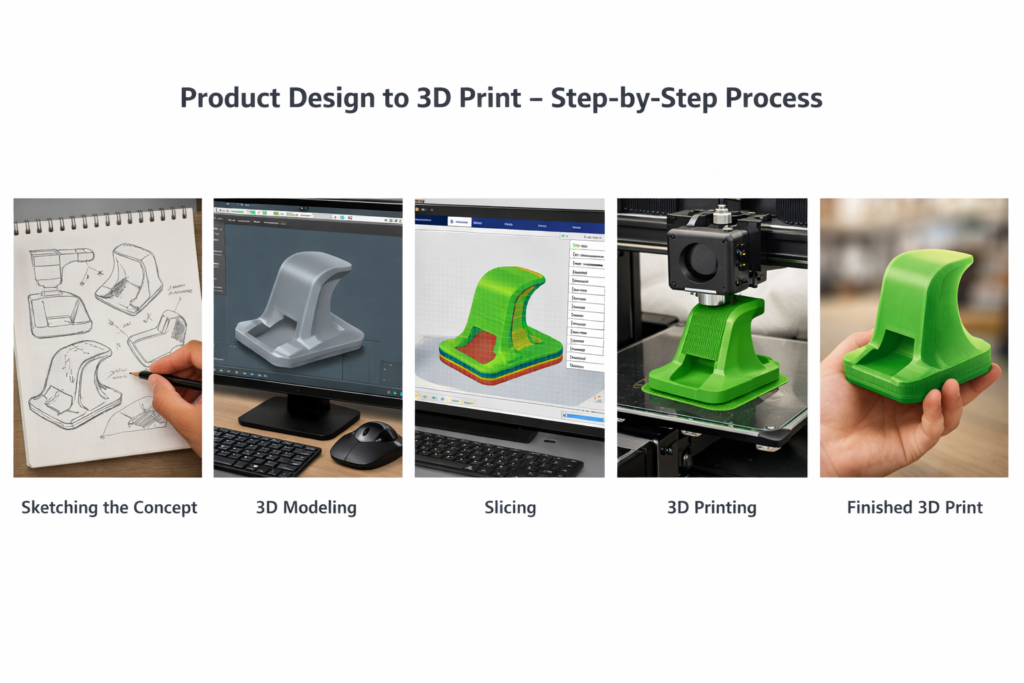
Step 1 – Idea and Concept
Every 3D printed product begins with an idea. This could be a new product, a replacement part, or a design improvement. At this stage, you define the purpose, size, shape, and function of the object.
Clear planning helps reduce errors later in the design and printing stages.
Step 2 – CAD Design
Once the idea is ready, it is converted into a digital model using CAD (Computer-Aided Design) software. The CAD file contains the exact dimensions and shape of the part.
Good CAD design is critical for 3D printing accuracy. Features like wall thickness, holes, and supports must be properly designed for successful printing.
Step 3 – Slicing the Model
The CAD file is then imported into slicing software. The slicer converts the 3D model into thin layers and generates instructions for the 3D printer.
Settings such as layer height, infill, speed, and support structures are selected during this stage. This step directly affects print quality, strength, and cost.
Step 4 – 3D Printing
The sliced file is sent to the 3D printer. The printer builds the object layer by layer using plastic filament or resin. Depending on size and complexity, printing can take from a few minutes to several hours.
This is where your digital design becomes a real physical part.
Step 5 – Post-Processing
After printing, the part may need cleaning, support removal, sanding, or curing. Post-processing improves the surface finish and prepares the part for use or presentation.
For professional results, post-processing is an important part of the 3D printing workflow.
Why Following the Right Process Matters
By following the correct product design to 3D print process, you get better quality, stronger parts, and fewer printing errors. This saves time, material, and cost, especially for prototypes and production parts.
Conclusion
From idea to final part, the product design to 3D printing process involves careful planning, precise design, and accurate printing. Understanding each step helps you create high-quality 3D printed products that meet your exact requirements.
Whether you are a student, startup, or manufacturer, mastering this process is the key to successful 3D printing.